
【Swift】MKMapView:ピンに画像やCustomViewを設定する
こんにちは。
今まで触る機会がなかったMapViewを実装する機会がありまして、色々とメモしたいことがあるので備忘録です。
今回はピンにCustomViewを設定する話です。
Annotationに画像を設定したい場合
デフォルトのピンではなく、独自のデザインを設定したい場合は画像として設定するのが早いです。
なお、このピンはAnnotationというので以下でそう使います。
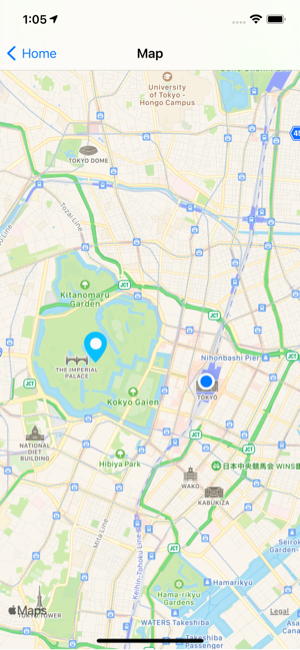
Annotationをマップに落とす場合は以下のようにmapViewに必要な分のAnnotationを追加します。
    private func setAnnotations() {
        let annotation = MKPointAnnotation()
        annotation.coordinate = CLLocationCoordinate2D(latitude: 35.68493104294112, longitude: 139.75273538025138)
        mapView.addAnnotation(annotation)
    }
MKMapViewDelegate の ViewFor で画像を設定します。
    func mapView(_ mapView: MKMapView, viewFor annotation: MKAnnotation) -> MKAnnotationView? {
        // ignore UserLocation
        if annotation is MKUserLocation { return nil }
        let identifier = "pin"

        let annotationView = mapView.dequeueReusableAnnotationView(withIdentifier: MKMapViewDefaultAnnotationViewReuseIdentifier)
        if annotationView == nil {
            annotationView = MKAnnotationView(annotation: annotation, reuseIdentifier: identifier)
        } else {
            annotationView?.annotation = annotation
        }

        // set custom image
        annotationView?.image = R.image.ic_annotation()

        return annotationView
    }
Annotationにカスタムビューを設定したい場合
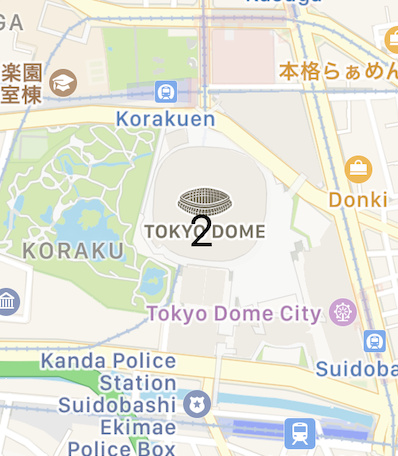
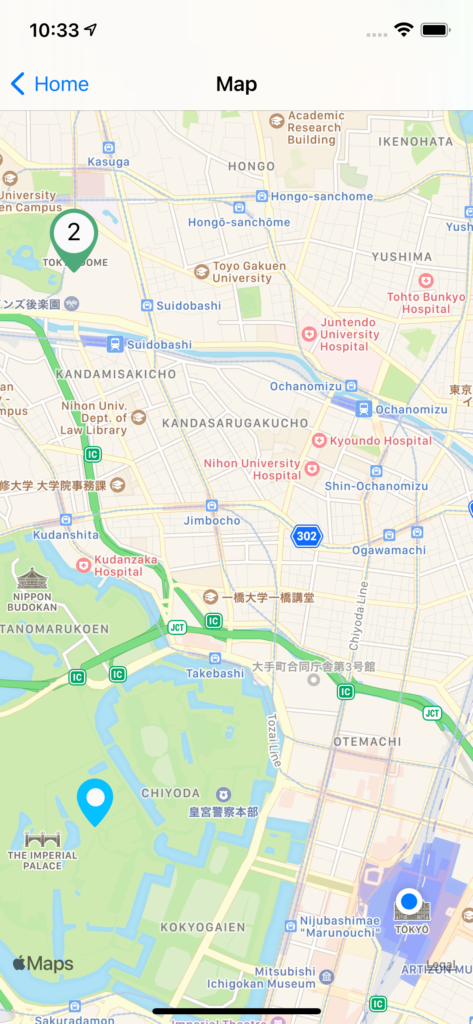
ただ画像を変えたいだけなら上記で問題ないですが、Annotationに番号をふったり、Annotationに乗る情報を動的に設定したい場合はCustomViewを設定するといいです。
色々説明したい部分があるので分けて説明します。
MKPointAnnotation のカスタムクラスを作成する
加工などは基本的に mapView(_ mapView: MKMapView, viewFor annotation: MKAnnotation) で行うので、値を設定しやすいように MKPointAnnotation のカスタムクラスを作成し値を持たせます。
class PlaceAnnotation: MKPointAnnotation {
    let index: String
    var name: String
    var image: UIImage
    var latitude: Double
    var longitude: Double

    init(index: Int, name: String, image: UIImage, latitude: Double, longitude: Double) {
        self.index = index.description
        self.name = name
        self.image = image
        self.latitude = latitude
        self.longitude = longitude
    }
}
データは入れたい情報、なんでもいいですが、APIから取得してきたりするケースが多いと思うのでそのデータを持たせたりするといいと思います。
MKAnnotationView のカスタムクラスを作成する
接待したいViewのカスタムクラスを作成します。
この場合は MKAnnotationView を継承します。
import UIKit
import MapKit

final class PlaceAnnotationView: MKAnnotationView {

    @IBOutlet weak var label: UILabel!

    override init(annotation: MKAnnotation?, reuseIdentifier: String?) {
        super.init(annotation: annotation, reuseIdentifier: reuseIdentifier)

        centerOffset = CGPoint(x: 0, y: -frame.size.height / 2)
        loadFromNib()
    }

    required init?(coder aDecoder: NSCoder) {
        super.init(coder: aDecoder)

        loadFromNib()
    }

    private func loadFromNib() {
        let nib = R.nib.placeAnnotationView
        guard let view = nib.instantiate(withOwner: self).first as? UIView else { return }
        view.frame = bounds
        addSubview(view)
    }
}
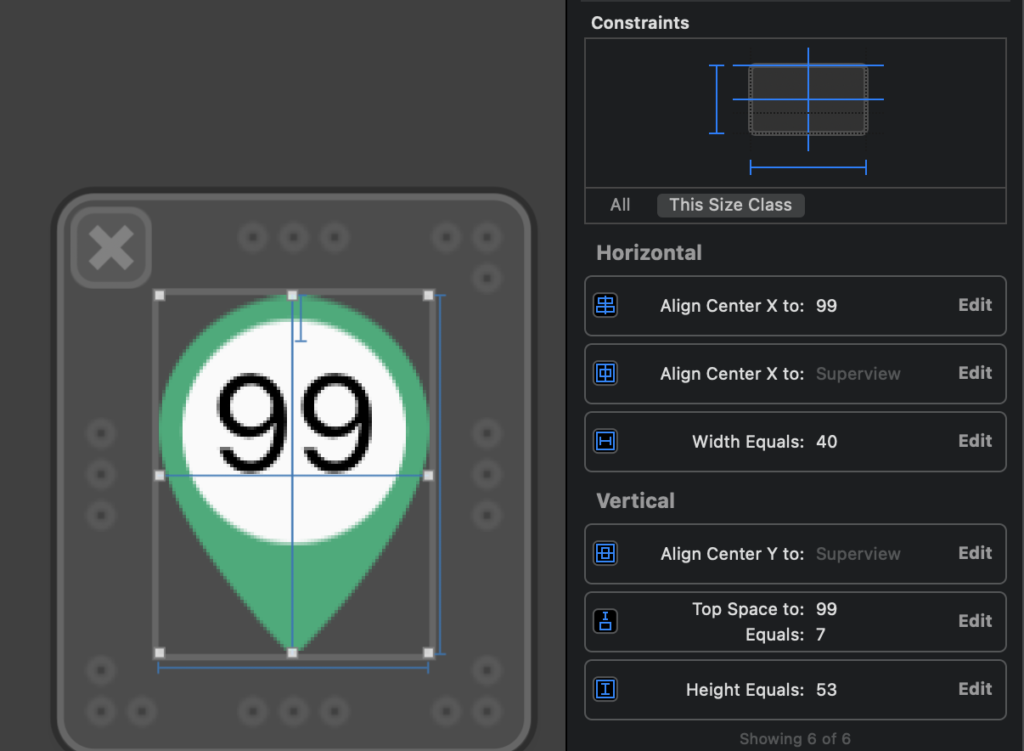
中心位置を修正するために centeroffset に少し手を加えます。
注意点として、xibで作成する場合はsuperviewに制約を上下左右合わせないようにしてください。
このようにレイアウトがうまく表示されません。
このようにwidth / height で基本となるViewのサイズを取るとうまくいきます。
DelegateにAnnotationを設定する
最後にDelegateメソッドにAnnotationの設定を記述します。
    func mapView(_ mapView: MKMapView, viewFor annotation: MKAnnotation) -> MKAnnotationView? {
        // ignore UserLocation
        if annotation is MKUserLocation { return nil }

        let annotationView = mapView.dequeueReusableAnnotationView(withIdentifier: MKMapViewDefaultAnnotationViewReuseIdentifier) as? PlaceAnnotationView
        if let annotation = annotation as? PlaceAnnotation {
            annotationView?.label.text = annotation.index
        }
        return annotationView
    }
異なるCustomViewを複数利用したい場合は、その分 register し、上記で説明した画像の入れ替えだけを行うAnnotationと混ぜたい場合も、viewFor 内で分けて設定すれば実現できます。
    func mapView(_ mapView: MKMapView, viewFor annotation: MKAnnotation) -> MKAnnotationView? {
        // ignore UserLocation
        if annotation is MKUserLocation { return nil }

        switch annotation {
        case is PlaceAnnotation:
            let annotationView = mapView.dequeueReusableAnnotationView(withIdentifier: MKMapViewDefaultAnnotationViewReuseIdentifier) as? PlaceAnnotationView
            if let annotation = annotation as? PlaceAnnotation {
                annotationView?.label.text = annotation.index
            }
            return annotationView

        default:
            let identifier = "pin"
            var annotationView = mapView.dequeueReusableAnnotationView(withIdentifier: identifier)
            if annotationView == nil {
                annotationView = MKAnnotationView(annotation: annotation, reuseIdentifier: identifier)
            } else {
                annotationView?.annotation = annotation
            }

            annotationView?.image = R.image.ic_annotation()

            return annotationView
        }
    }
静的表示を行いたい場合はregisterさえすれば特にDelegateの実装はしなくて済みます。
表示に関しては以上です!
終わりに
MapViewは今まで利用する機会がなくいい経験ができてよかったです、この辺はどの案件でも使いそうな知見ですし、、
よかったら参考にしてみてくださいな。